When I started collecting these old space sets in force circa 2013? I had an idea that what I wanted out of this endeavor was to build a Spaceship kind of like Deep Freeze Defender, but for Futuron.
Of course there was also this part of me that really liked that color scheme for the spaceship in the Seatron development image. I've half a mind to build a Submarine and modular transport hauler to option in according to the colorscheme.
Via
Brickipedia
Originally featured in
brickjournal6
So I'll probably do a more true Futuron color scheme mothership at some point... but for now... this Seatron riff on Deep Freeze Defender is what I've done.
I built my model up in modules much like Deep Freeze Defender, I started with the modular method so I could make the task seem easier, and to avoid my childhood pitfall of letting the design get away from me.
I'll explain any part additions through the walkthrough... but by and large the pieces you see here are from Futuron, Space Police, and M:Tron sets... as I delve deeper into the next blog part(s?) you'll start to see Blacktron pieces showing up with a handful more of stray part callouts. My goal is to show off just what it was these toys could do as they were in... say, 1990.
Working from small to large as often happens in a Legoland instruction manual I assembled escort fighter x2.

From the beginning I was anticipating the use of the
red striped Classic Space nose, which is one of the odd part additions I threw into the Golden Era Space collection for this build. Red blends well beneath the red canopy and gives the interior some color along with the M:TRON console. In a reversal from Futuron I played off the Seatron spaceship's transparent red, white and black by feeding in bits of Transparent blue.
I love transparent blue sooo much!

Parts 3 and 4 mirrored were the edges of this part 5 spaceship. I designed the mirrored edges for the front cockpits as segments to bolt into an as yet unknown midship portion with the only plan being the use of that Classic Space V-Nose.

This was part 5 in the process. The aforementioned Classic Space nose appears here to good effect. I'd thought about using the transparent Blue Spyrius antennae for this, but I only have 1 slightly bent example to work with and 1 very bent example, so I focused on the Futuron 6990 stalks again; I'd emptied out a sellers supply of them when my 6990 was delivered without the pieces so I have an untold number of t-(he means 5). The transparent red windows have a bit of gap here in the classical manner. Some people don't seem to like such gaps, but I think it makes the ship look more convincing as an actual Legoland prototype/finished product. I took an ever so slightly unconventional route when mounting it to the body.
The mount point is a
black bracket notable for transition from a 2 wide base to a one wide plate which I then hinged back into a 2 wide hinge granting a swift lift of the window with minimal part usage.

I took off the rockets from the front spaceships and bolted all 5 modular sections together. As Modules I could establish each chapter and verse of the model as I built up the overarching plot; SPACESHIP!!!. I could prevent the over reach of a solidly built up and awkwardly sized plate or brick if I needed to make a change midway. To me at this point in the build this was looking pretty good. This was the first night of work... 2.5 hours or thereabouts... dinner that night was a rush job.

Next night up I built this cargo unit which turned into a kind of space station research lab as these things tend to develop. I take the view that it can be landed and left behind. It took an additional 2 hours... I had a lot of trouble with blending it in, 'and' making it shapely in its own right. Elements in addition to the main themes are an extra
white space panel wall with stripes, 4
transparent blue Belleville rocket tips, one of the
black boxes from Ogel's Shuttle Launch complete with transparent red box lid, and one
transparent blue Belleville shower head/insectoid radar eyestalk.

My Astronaut researcher's beveridge is a lemonlime sno-cone. If you can see it, the Octagon window hinge wall can be fitted with Space Police's prison windows, and to get a good bit of transparent red into the model, I totally took advantage of that fit. The backside with the white and black accents was the last part and probably took the lions share of my thinking about how to get something aesthetically compatible to the red window octagon side while making a mount point to the previous build.
Inside there's a tool supply depot, and a type of disk reading computer. The disk tile is remove-able and stored in the box behind the astronaut.

The base capsule paired well with the two front escort craft and mirrored edge connectors, and on the third night I produced the rear wings which you see sported quite nicely by the midship command cabin. You know, not where they should be.

So it was on the third night I mounted the mirrored rear wing modules as a pair and brought the look together. the wings took about an hour or so and I transferred the rockets from the duplicate spaceships to the back. More Belleville Showerheads added a bit of eye-catching awesomesauce.
I had a lot of trouble sourcing those blue showerheads and blue rocket tips in quantity and available together back a few years ago... just soo you know, that's why I want to use them on everything I build. The endeavor was expensive... very very expensive... something something Europe, overseas shipping, bother bother bother.
S
omeone call Lego and tell them we need more sets carrying transparent blue rocket tips and Insectoid showerheads.
I thought it was a surprisingly pretty result...
After finishing up I set the model out for photography. And tried out some unplanned combinations with the chunks of module. Needless to say I liked them... or I might have just said, oh yeah, it can recombine and... yeah... I liked them.
With a quick flip I can switch command cabin to be the rear as the mirrored connector edges and wings can function on either fuselage piece.
With a quick flip and some rocket rearrangements; as above... so below, but now the back is the front.
This fleet is perhaps the least interesting mix of small ships, but I think the individual units work when considered as options of options. The moonbase module can fly itself down without the fleet of one ship having to waste fuel on reentry and departure. Oh yeah, those blue rocket tips are treated by me for these things as the miniest of modules... for when a variant seems to lack boosters.
I especially fancy this interpretation. It's a shape I don't think I would've gone for as is, but I like the heavy transport with escort craft feel achieved this way.
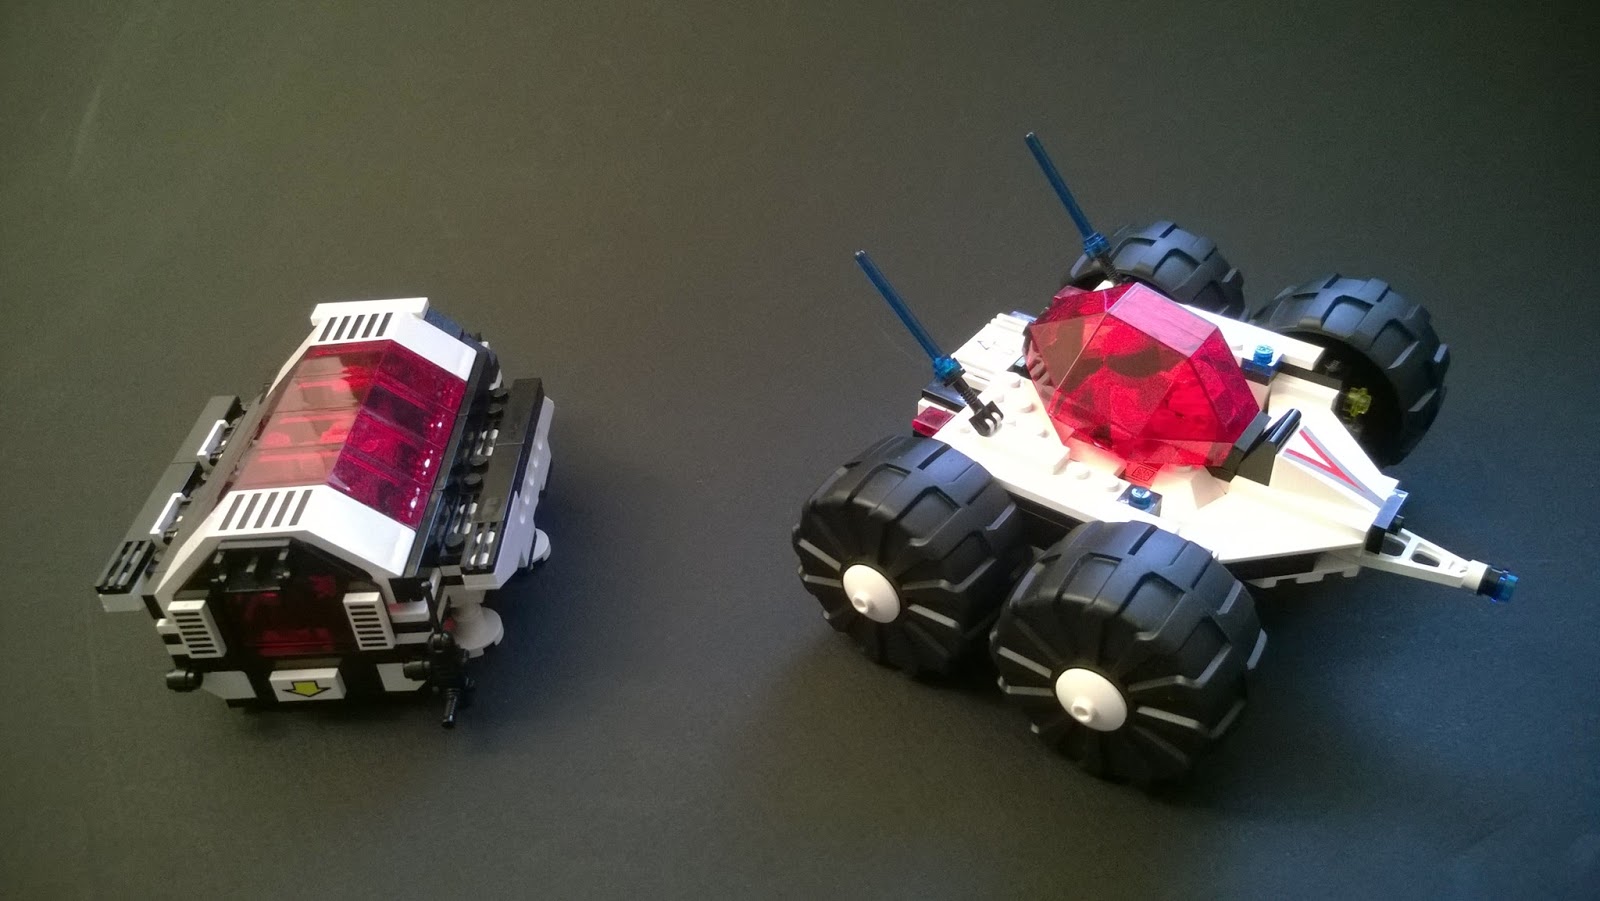
About a month later I came back to this spacecraft and decided to build wheel modules for the central fuselage.
But that's for another blogpost.
Sincerely, the Cure-all Pill






 Posts
Posts

